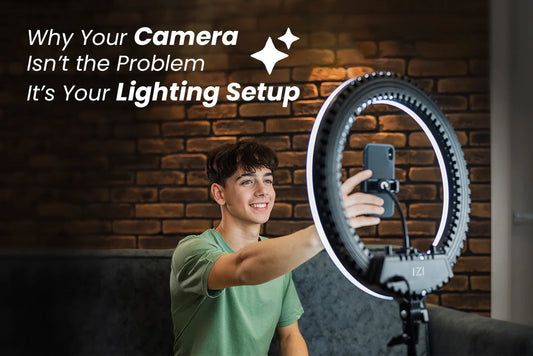

From glowing selfies to flawless makeup tutorials and crisp Zoom calls—ring lights have become a non-negotiable part of every content creator’s toolkit. But here’s the catch: buying the best ring light is only half the equation. The magic really happens when you know how to use it.
So, how do you move beyond the basic front-facing glow and start using your ring light like a pro?
Whether you’re shooting for YouTube, streaming on Twitch, recording Reels, or joining your Monday meeting on Zoom, mastering these 6 ring light angles will take your lighting game from flat to fantastic.
1. Straight-On Glow – The Classic Setup
Let’s start with the most well-known angle: placing the ring light directly in front of your face, with the camera (or phone) shooting through the center of the ring.
This setup provides even, soft illumination across your face, minimizing shadows and enhancing natural skin texture. It’s flattering, simple, and perfect for:
-
Selfies
-
Beauty tutorials
-
Zoom meetings
-
Livestreams
Pro Tip: Use a dimmable ring light and experiment with color temperature (warm, neutral, cool) to match your environment or skin tone.
2. 45-Degree Side Angle – For Depth and Drama
Looking to add dimension and drama to your shots? Shift your ring light to a 45-degree angle from your face (left or right) instead of dead center.
This creates soft shadows on one side, giving your face more depth and your content a cinematic feel—great for:
-
Product demos
-
Portrait-style vlogs
-
Dramatic storytelling
Why it works: This angle mimics natural light from a window and adds a three-dimensional look to flat videos.
3. Top-Down Angle – For That Editorial Feel
Position your ring light slightly above your eye level, angled down at about 30–45 degrees. This top-down angle is subtle but incredibly flattering. It highlights cheekbones, sharpens jawlines, and avoids the dreaded “under-chin shadow.”
Use this setup when you want to look polished and professional on camera—especially for:
-
Fashion content
-
Makeup tutorials
-
Headshot-style content
Note: Keep your chin slightly up and your posture straight to make the most of this lighting angle.
4. Bottom-Up Angle – For Bold Creators Only
Okay, this one’s not for everyone—but used creatively, placing your ring light below the face creates a spooky or stylized effect.
It throws shadows upward, which can make the scene look mysterious, edgy, or even surreal. It’s great for:
-
Halloween or horror-themed videos
-
Artistic photoshoots
-
Experimental Reels
Caution: Use sparingly. This angle can be unflattering for day-to-day content but works wonders for niche effects.
5. Backlight Glow – For Soft Silhouettes and Halos
Most people use ring lights for front lighting—but placing your ring light behind you, out of frame, creates a gorgeous rim light or halo effect that separates you from the background.
This backlight technique is excellent for:
-
Silhouetted shots
-
Hair light for extra polish
-
Mood lighting for creative storytelling
Combo Move: Pair this with a soft front-facing light (like a desk lamp or secondary ring light) for pro-level, studio-quality depth.
6. Flat Lay Lighting – Overhead for Products
Ring lights aren’t just for faces—they’re perfect for product shots too.
For unboxings, flat lays, or recipe content, mount your ring light directly above your subject to get even, shadowless illumination. This eliminates harsh contrasts and brings out fine details.
Use this angle for:
-
Craft or DIY videos
-
Food content
-
Tech or accessory reviews
Setup Tip: Use a ring light with a flexible gooseneck arm or tripod extension to easily adjust the height and angle for top-down shots.
Bonus: Combine Angles for More Creativity
Want to stand out even more? Try combining ring light angles—like a backlight for a halo glow, paired with a 45-degree side light for drama. Using multiple ring lights or reflectors adds professional polish to your setup and helps create your own signature look.
So, Which Angle is Best?
There’s no one-size-fits-all. The best ring light angle depends entirely on your content type, mood, and what you want your audience to feel.
| Content Type | Ideal Ring Light Angle |
| Selfies & Tutorials | Straight-on Glow |
| Product Demos | 45-Degree Side |
| Fashion & Makeup | Top-Down |
| Experimental Shots | Bottom-Up |
| Silhouettes | Backlight |
| Flat Lays | Overhead |
Final Thoughts: Light Smarter, Not Harder
Lighting can make or break your video. You can have the best script, killer camera, and perfect setup—but if your lighting is off, your content may never shine the way it deserves.
Invest in a good ring light, but more importantly, invest time in understanding how to use it. Angles, distance, brightness, and temperature all contribute to how your audience sees you—and how your content performs.
So the next time you're about to hit record, don’t just switch your ring light on. Angle it with intention. Light like a pro. And create content that glows—literally.